Percorsi basati su DNS
A partire dalla versione KeeneticOS 5.0, una nuova scheda Percorso basato su DNS è stata aggiunta all'interfaccia web del router nella pagina Routing, in cui è possibile creare le proprie regole di routing tramite una connessione o un gateway specificato per liste di nomi di dominio e indirizzi IP definiti dall'utente. Ad esempio, questo può essere utilizzato in scenari Multi-WAN, in cui un router utilizza connessioni a più ISP e riserva il canale Internet principale. In questo caso, è possibile configurare il routing basato su DNS verso una lista di siti specificata tramite un'interfaccia o un gateway specifico.
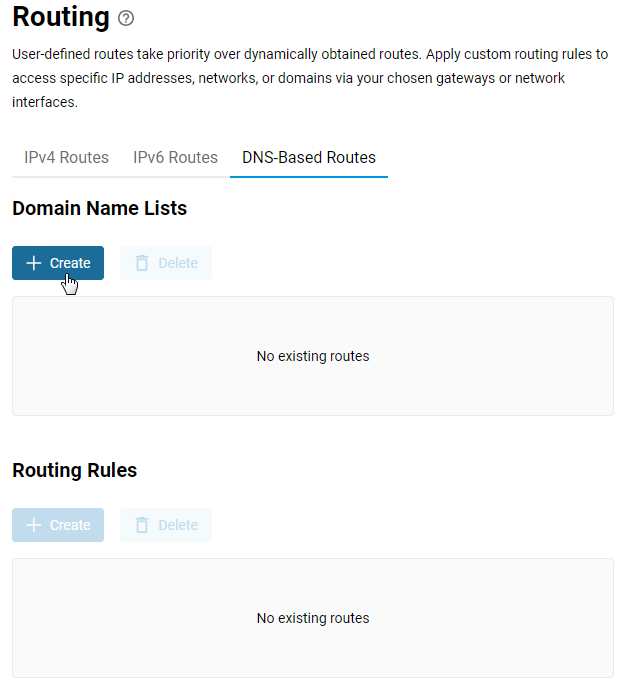
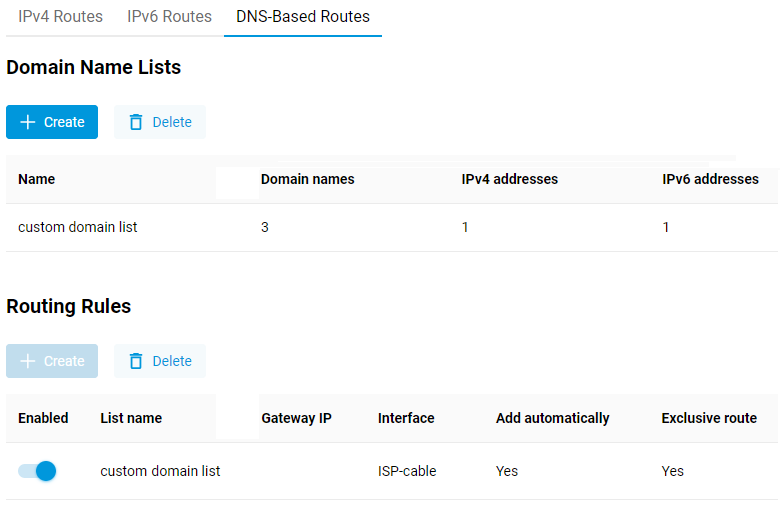
Andare alla scheda Percorso basato su DNS (DNS-Based Routes) e fare clic sul pulsante Crea (Create) nella sezione Elenchi di nomi di dominio (Domain Name Lists).
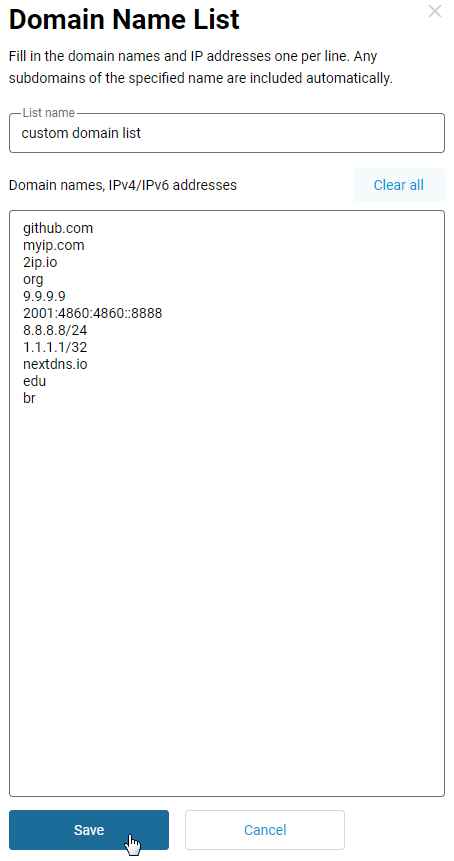
Nella finestra Elenco dei nomi di dominio (Domain Names List), specificare un Nome lista (List name) e inserire i nomi di dominio e/o gli indirizzi IP nel campo Nomi di dominio, indirizzi IPv4/IPv6 (Domain names, IPv4/IPv6 ddresses), uno per riga. Tutti i sottodomini del nome specificato sono inclusi automaticamente; non utilizzare il simbolo * nei nomi di dominio. Fare clic sul pulsante Salva (Save).
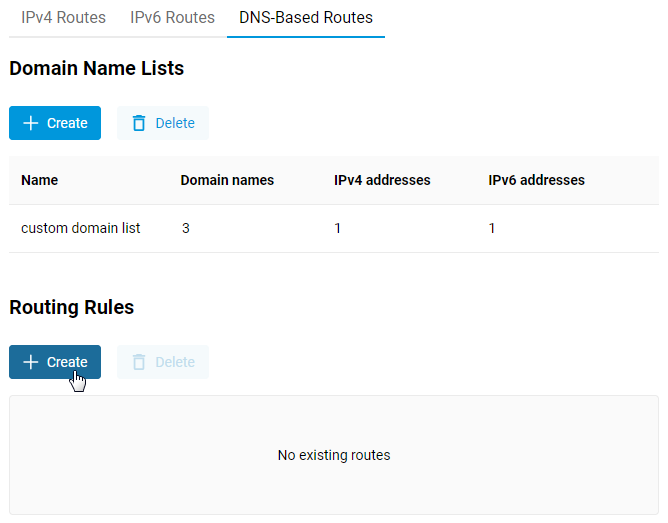
Successivamente, nella sezione Regole di routing (Routing Rules), fare clic sul pulsante Crea (Create).
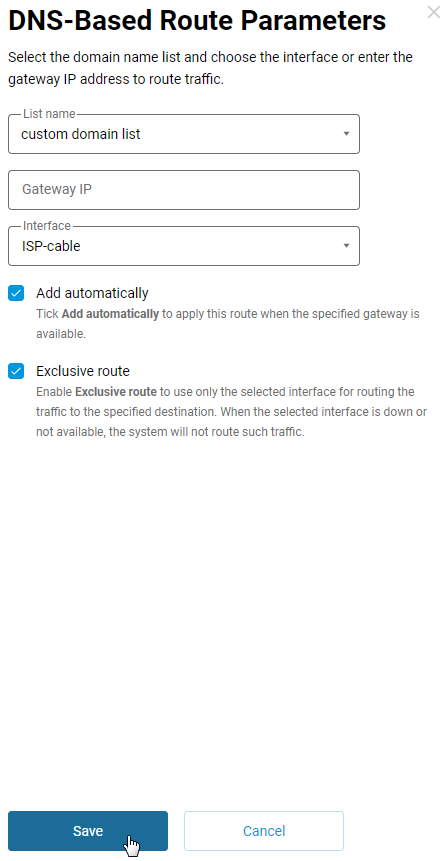
Nella finestra Parametri route basata su DNS, selezionare la lista creata in precedenza nel campo Nome lista e specificare l'interfaccia per il routing nel campo Interfaccia o inserire l'indirizzo IP del gateway nel campo corrispondente. Selezionare la casella di controllo Aggiungi automaticamente (Add automatically) per applicare la route quando il gateway specificato è disponibile. Selezionare la casella di controllo Percorso esclusivo (Exclusive route) per instradare il traffico solo verso l'interfaccia selezionata (se l'interfaccia selezionata è inattiva o non disponibile, tale traffico non verrà instradato). Fare clic sul pulsante Salva (Save).
Assicurarsi che la regola creata sia Abilitata (Enabled).
Importante
Le seguenti condizioni obbligatorie devono essere soddisfatte affinché il routing basato su DNS funzioni:
La connessione specificata nel campo Interfaccia per il routing deve essere configurata correttamente, abilitata e avere lo stato di Connesso.
Il client deve essere nella Policy predefinita nella pagina Policy di connessione;
L'indirizzo IP del router deve essere specificato come server DNS sul client.
Controllare le informazioni sulla connessione di rete del client e assicurarsi che l'indirizzo IP del router sia specificato nel campo Server DNS. Se viene visualizzato un indirizzo IP diverso (ad esempio, l'indirizzo di un resolver DNS pubblico), probabilmente è stato impostato manualmente un Server DNS pubblico aggiuntivo nelle impostazioni del router o è stato abilitato l'uso di DoT/DoH. In questo caso, è necessario rimuoverlo in modo che il router sia l'unico server DNS per il client e tutte le query DNS siano dirette ad esso.
Successivamente, procedere al test del routing. Tuttavia, prima di farlo, si consiglia di svuotare la cache DNS sul client. In Windows, questa operazione può essere eseguita con il comando ipconfig /flushdns.
Aprire il sito web specificato nella lista di domini nel proprio browser web. Per dimostrare come funziona il routing, abbiamo aggiunto appositamente alla lista il servizio online 2ip.io, che visualizza il vostro indirizzo IP (è possibile utilizzare qualsiasi altro servizio simile, come myip.com).
Prima di abilitare il routing DNS, sono state visualizzate le seguenti informazioni visitando il sito web 2ip.io:

E questo è il risultato dopo aver abilitato il routing basato su DNS:
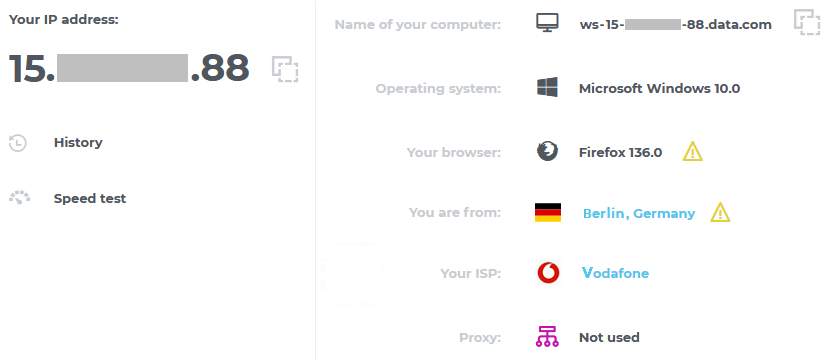
Possiamo vedere che quando il routing basato su DNS è abilitato, l'accesso al sito specificato viene eseguito tramite una connessione diversa, nel nostro caso tramite un ISP diverso.
Gli utenti esperti possono controllare il routing del traffico verso un sito specifico utilizzando l'utilità tracert (in Windows) o traceroute (in Linux e macOS). Per il nostro esempio, è necessario eseguire il comando tracert 2ip.io nella riga di comando.
Suggerimento
I moderni browser web consentono di abilitare una protezione avanzata delle query DNS e utilizzare DNS over HTTPS, un sistema di nomi di dominio che invia le query sui nomi di dominio attraverso una connessione crittografata, fornendo un DNS sicuro e impedendo ad altri di vedere quale sito web si sta tentando di accedere. Se il routing dei nomi di dominio non funziona, assicurarsi che questa funzione sia disabilitata nel proprio browser web e che venga utilizzata la risoluzione DNS predefinita.