Installazione e configurazione del pacchetto OPKG rTorrent
rTorrent è un client BitTorrent in C++ per Linux basato sulle librerie libTorrent. È un client BitTorrent leggero e con poche richieste di risorse di sistema.
Verrà descritta l'installazione del client torrent rTorrent dal repository Entware.
Per prima cosa è necessario preparare una chiavetta USB esterna e installarvi il sistema di pacchetti del repository Entware. La procedura è illustrata nell'articolo Utilizzo del file system EXT4 su unità USB.
Installare il pacchetto rtorrent-easy-install.
Eseguire il comando
opkg install rtorrent-easy-install:/ #
opkg install rtorrent-easy-installInstalling rtorrent-easy-install (0.2-3a) to root... Downloading http://bin.entware.net/mipselsf-k3.4/rtorrent-easy-install_0.2-3a_mipsel-3.4.ipk Installing rutorrent-plugin-rpc (3.8-1) to root... Downloading http://bin.entware.net/mipselsf-k3.4/rutorrent-plugin-rpc_3.8-1_mipsel-3.4.ipk Installing rutorrent (3.8-1) to root... Downloading http://bin.entware.net/mipselsf-k3.4/rutorrent_3.8-1_mipsel-3.4.ipk Installing rtorrent-rpc (0.9.7-1) to root... Downloading http://bin.entware.net/mipselsf-k3.4/rtorrent-rpc_0.9.7-1_mipsel-3.4.ipk Installing libcurl (7.61.0-3) to root... Downloading http://bin.entware.net/mipselsf-k3.4/libcurl_7.61.0-3_mipsel-3.4.ipk Installing libopenssl (1.0.2p-1) to root... Downloading http://bin.entware.net/mipselsf-k3.4/libopenssl_1.0.2p-1_mipsel-3.4.ipk Installing zlib (1.2.11-2) to root... Downloading http://bin.entware.net/mipselsf-k3.4/zlib_1.2.11-2_mipsel-3.4.ipk Installing ca-bundle (20180409-3) to root... Downloading http://bin.entware.net/mipselsf-k3.4/ca-bundle_20180409-3_all.ipk Installing libtorrent (0.13.7) to root... Downloading http://bin.entware.net/mipselsf-k3.4/libtorrent_0.13.7_mipsel-3.4.ipk Installing libsigcxx (2.5.4-1) to root... Downloading http://bin.entware.net/mipselsf-k3.4/libsigcxx_2.5.4-1_mipsel-3.4.ipk Installing libncursesw (6.1-1) to root... Downloading http://bin.entware.net/mipselsf-k3.4/libncursesw_6.1-1_mipsel-3.4.ipk Installing xmlrpc-c-server (1.39.13-2) to root... Downloading http://bin.entware.net/mipselsf-k3.4/xmlrpc-c-server_1.39.13-2_mipsel-3.4.ipk Installing xmlrpc-c (1.39.13-2) to root... Downloading http://bin.entware.net/mipselsf-k3.4/xmlrpc-c_1.39.13-2_mipsel-3.4.ipk Installing xmlrpc-c-internal (1.39.13-2) to root... Downloading http://bin.entware.net/mipselsf-k3.4/xmlrpc-c-internal_1.39.13-2_mipsel-3.4.ipk Installing xmlrpc-c-common (1.39.13-2) to root... Downloading http://bin.entware.net/mipselsf-k3.4/xmlrpc-c-common_1.39.13-2_mipsel-3.4.ipk Installing coreutils-stat (8.23-3) to root... Downloading http://bin.entware.net/mipselsf-k3.4/coreutils-stat_8.23-3_mipsel-3.4.ipk Installing coreutils (8.23-3) to root... Downloading http://bin.entware.net/mipselsf-k3.4/coreutils_8.23-3_mipsel-3.4.ipk Installing coreutils-id (8.23-3) to root... Downloading http://bin.entware.net/mipselsf-k3.4/coreutils-id_8.23-3_mipsel-3.4.ipk Installing gzip (1.9-1) to root... Downloading http://bin.entware.net/mipselsf-k3.4/gzip_1.9-1_mipsel-3.4.ipk Installing curl (7.61.0-3) to root... Downloading http://bin.entware.net/mipselsf-k3.4/curl_7.61.0-3_mipsel-3.4.ipk Installing screen (4.6.2-1) to root... Downloading http://bin.entware.net/mipselsf-k3.4/screen_4.6.2-1_mipsel-3.4.ipk Installing libncurses (6.1-1) to root... Downloading http://bin.entware.net/mipselsf-k3.4/libncurses_6.1-1_mipsel-3.4.ipk Installing php7-cgi (7.2.9-1) to root... Downloading http://bin.entware.net/mipselsf-k3.4/php7-cgi_7.2.9-1_mipsel-3.4.ipk Installing php7 (7.2.9-1) to root... Downloading http://bin.entware.net/mipselsf-k3.4/php7_7.2.9-1_mipsel-3.4.ipk Installing libxml2 (2.9.8-3) to root... Downloading http://bin.entware.net/mipselsf-k3.4/libxml2_2.9.8-3_mipsel-3.4.ipk Installing lighttpd-mod-fastcgi (1.4.49-2) to root... Downloading http://bin.entware.net/mipselsf-k3.4/lighttpd-mod-fastcgi_1.4.49-2_mipsel-3.4.ipk Installing lighttpd (1.4.49-2) to root... Downloading http://bin.entware.net/mipselsf-k3.4/lighttpd_1.4.49-2_mipsel-3.4.ipk Installing lighttpd-mod-scgi (1.4.49-2) to root... Downloading http://bin.entware.net/mipselsf-k3.4/lighttpd-mod-scgi_1.4.49-2_mipsel-3.4.ipk Installing lighttpd-mod-auth (1.4.49-2) to root... Downloading http://bin.entware.net/mipselsf-k3.4/lighttpd-mod-auth_1.4.49-2_mipsel-3.4.ipk Installing lighttpd-mod-authn_file (1.4.49-2) to root... Downloading http://bin.entware.net/mipselsf-k3.4/lighttpd-mod-authn_file_1.4.49-2_mipsel-3.4.ipk Configuring zlib. Configuring libopenssl. Configuring ca-bundle. Configuring libcurl. Configuring lighttpd. Configuring lighttpd-mod-authn_file. Configuring xmlrpc-c-common. Configuring xmlrpc-c-internal. Configuring xmlrpc-c. Configuring libxml2. Configuring php7. Configuring php7-cgi. Configuring coreutils. Configuring coreutils-stat. Configuring libsigcxx. Configuring libtorrent. Configuring libncursesw. Configuring xmlrpc-c-server. Configuring rtorrent-rpc. Configuring coreutils-id. Configuring gzip. Configuring curl. Configuring rutorrent. Configuring rutorrent-plugin-rpc. Configuring libncurses. Configuring screen. Configuring lighttpd-mod-fastcgi. Configuring lighttpd-mod-scgi. Configuring lighttpd-mod-auth. Configuring rtorrent-easy-install.Quando si installa il pacchetto, verrà immediatamente richiesto di configurare le funzioni di base.
È possibile impostare login/password, porta, velocità di upload/download, percorso per i file torrent scaricati:
Digitare "nome utente:password" se si desidera proteggere l'interfaccia utente Web oppure premere Invio per lasciare disabilitata la protezione con password []: impostare il proprio nomeutente:password, ad es. myhome:mytorrent
Quale porta deve essere utilizzata dall'interfaccia web? [81]: la porta predefinita è 81, è possibile impostare qualsiasi porta libera.
Inserire la velocità di download (massima) in KB/s [2048]: la velocità predefinita è 2048, è possibile impostare un valore personalizzato.
Inserire la velocità di upload (massima) in KB/s [2048]: la velocità predefinita è 2048, è possibile impostare un valore personalizzato.
Inserire il nome della cartella sull'unità USB in cui archiviare i contenuti torrent [/opt/torrents]: specificare il percorso in cui verranno scaricati i file torrent. È preferibile utilizzare una partizione NTFS. Ad esempio, se è stata creata una partizione con file system NTFS chiamata
FILESe al suo interno la directorydownload, specificare il percorso:/tmp/mnt/FILES/download#### Welcome to rtorrent easy installation script! We assuming no lighttpd/rtorrent/rutorrent was installed before! Please, answer a few question to configure torrent client. Default aswers given in [brackets], just hit Enter to accept it. Type "username:password" if you want to protect Web UI or hit Enter to leave password protection disabled []: test:test Which port should be used by web interface? [81]: Enter (maximal) download speed in KB/s [2048]: Enter (maximal) upload speed in KB/s [2048]: Enter folder name on USB drive where torrent content should be stored [/opt/torrents]: Done! You may open 51411-51412 TCP/UDP ports on your router to facilitate uploading/donwloading. It's not necessary but recommended. rutorrent web UI will be available at following URL: http://<ip_address_of_router>:<port>/rutorrent Do you wish to start torrent client? [y]: Starting lighttpd... done. Starting rtorrent... done.
Se il daemon rtorrent non si avvia, verrà visualizzato un errore:
Do you wish to start torrent client? [y]:
 Starting lighttpd... done.
 Starting rtorrent... failed.
Collected errors:
 * pkg_run_script: package "rtorrent-easy-install" postinst script returned status 255.
 * opkg_configure: rtorrent-easy-install.postinst returned 255.
Sarà necessario apportare modifiche alla configurazione di rtorrent. A tal fine, sarà necessario installare il pacchetto nano e modificare il file di configurazione rtorrent.conf.
Installare il pacchetto nano:
/ #
opkg install nanoInstalling nano (2.9.8-1) to root... Downloading http://bin.entware.net/mipselsf-k3.4/nano_2.9.8-1_mipsel-3.4.ipk Configuring nano.Modificare il file di configurazione rtorrent.conf, eliminando la vecchia configurazione:
/ # nano /opt/etc/rtorrent/rtorrent.conf
Evidenziare tutte le righe della vecchia configurazione, premere
Alt + A:max_uploads = 8 session = /opt/etc/rtorrent/session schedule = watch_directory,5,5,load_start=/opt/etc/rtorrent/watchdir/*.torrent schedule = untied_directory,5,5,stop_untied= schedule = low_diskspace,5,60,close_low_diskspace=100M bind = 0.0.0.0 port_range = 51411-51411 check_hash = yes #use_udp_trackers = yes encryption = allow_incoming,enable_retry,prefer_plaintext dht = auto dht_port = 51412 peer_exchange = yes scgi_local = /opt/var/rpc.socket encoding_list = UTF-8 max_uploads_global = 32 max_downloads_global = 64 download_rate = 2048 upload_rate = 2048 directory = /opt/torrents
Eliminare tutte le righe della vecchia configurazione, premere
Ctrl + K.Aggiungere le righe della nuova configurazione, premere
Ctrl + V:throttle.max_uploads.set = 8 session.path.set = /opt/etc/rtorrent/session schedule2 = watch_directory,5,5,load_start=/opt/etc/rtorrent/watchdir/*.torrent schedule2 = untied_directory,5,5,stop_untied= schedule2 = low_diskspace,5,60,close_low_diskspace=100M network.bind_address.set = 0.0.0.0 network.port_range.set = 51411-51411 pieces.hash.on_completion.set = yes trackers.use_udp.set = yes protocol.encryption.set = allow_incoming,enable_retry,prefer_plaintext dht.mode.set = auto dht.port.set = 51412 protocol.pex.set = yes network.scgi.open_local = /opt/var/rpc.socket encoding.add = UTF-8 throttle.max_uploads.global.set = 32 throttle.max_downloads.global.set = 64 throttle.global_down.max_rate.set_kb = 0 throttle.global_up.max_rate.set_kb = 0 directory.default.set = /opt/torrents
Premere
Ctrl + O, salvare la configurazione.Uscire dall'editor nano premendo
Ctrl + X.Avviare rtorrent:
/ #
/opt/etc/init.d/S85rtorrent startStarting rtorrent... done.Andare all'interfaccia web di rTorrent all'indirizzo
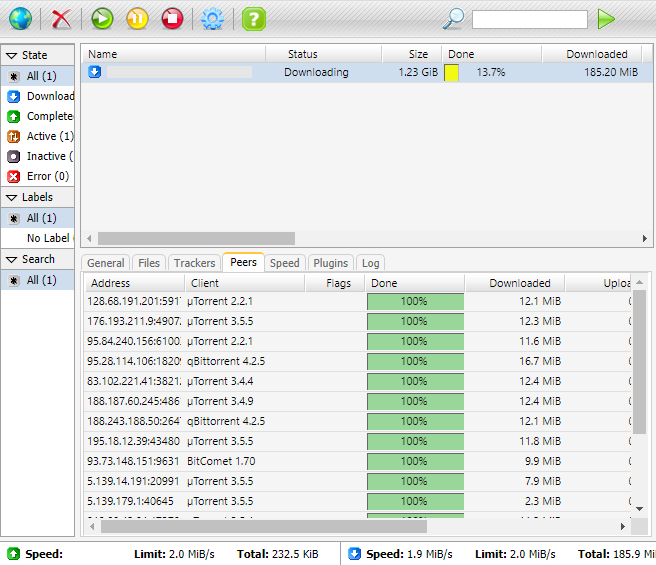
http://192.168.1.1:81/rutorrent/, configurare e verificare il suo funzionamento: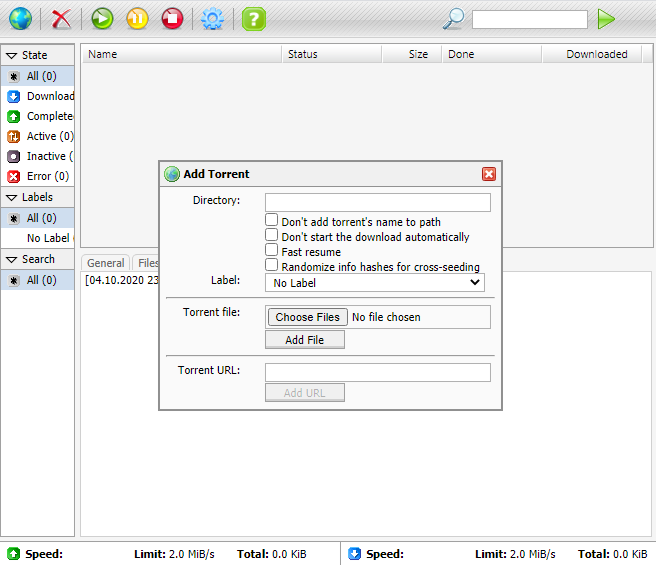
Importante
Il supporto per il pacchetto è fornito nella discussione del forum degli sviluppatori — rTorrent - client BitTorrent.