WireGuard VPN server
Starting with KeeneticOS 5.0, Keenetic routers feature the WireGuard VPN Server application — a modern, high-performance VPN solution for secure remote access to your home network from any client. Administrators create and manage peers directly through the web interface, automatically generating configuration files and QR codes for instant connection. The new WireGuard VPN Server application simplifies configuring various remote connection scenarios and makes installation on client devices easy.
Configuring the WireGuard VPN server on the Applications page is the most convenient and fastest way to set up a VPN server. Using client connections, you can get secure remote access to any part of the local network behind the VPN server.
For a more flexible WireGuard VPN configuration, or to build complex topologies and site-to-site connections, use the configuration on the Other Connections page. For more information, see the WireGuard VPN article.
Important
If you plan to use your Keenetic router as a VPN server, you must first check that it has a public IP address, and if you are using the KeenDNS service, that it is operating in Direct Access mode, which also requires a public IP address. If any of these conditions are not met, it will be impossible to connect to such a VPN server from the Internet.
Configuring WireGuard VPN server
To configure secure connections using the WireGuard protocol, you need to install the WireGuard VPN Server system component. You can do this in the web interface on the General System Settings page in the KeeneticOS Updates and Component Options section by clicking Component options.

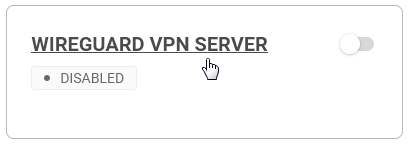
After that, the WireGuard VPN Server tile will appear on the Applications page. Click the WireGuard VPN Server link to open the settings.
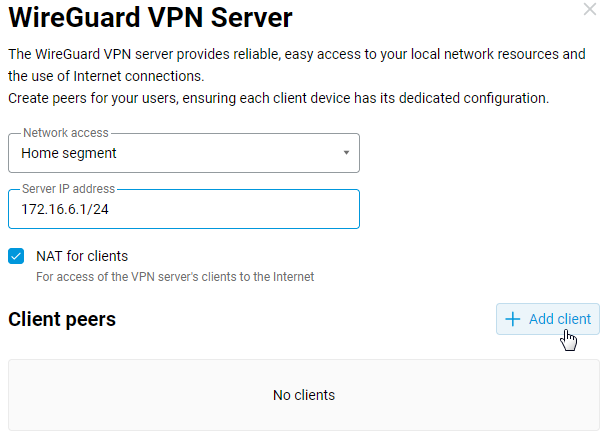
In the Network access field, you can select the local network segment that will be accessible to clients.
The Server IP address field specifies the VPN server address. This is the internal IP address of the tunnel interface in IP/bitmask format. In our example, it is 172.16.6.1/24, but you can use any subnet from the private range, as long as it does not overlap with other subnets on the router itself. Clients will be assigned an IP address from the same subnet.
The NAT option for clients is enabled by default. This setting allows VPN clients to access the Internet.
To continue the setup, click the + Add client button.
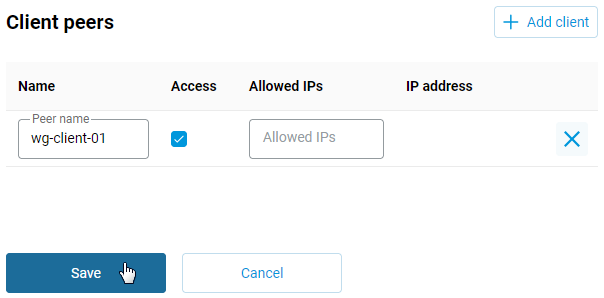
In the Client peers section, enter a name in the Name field, tick the Access box, and click Save.
The Allowed IPs field defines the set of allowed subnets. These are the address spaces from which this peer can receive and send traffic. If you need to configure access from the WireGuard server to a subnet located behind a VPN client, specify the client's subnet—or multiple subnets (separated by commas)—in the Allowed IPs field to allow them within the tunnel. For more information, see the article Example of connecting networks via the WireGuard VPN server app.
If you only need to set up a remote connection for a mobile client and secure access to the local network behind the VPN server, leave the Allowed IPs field blank.
After creating the peer, the Client Peer Configuration window will open automatically. Click the Download configuration button to save the WireGuard connection configuration file. The resulting file with the .conf extension can then be uploaded to the VPN client settings (a Keenetic router can act as a VPN client).
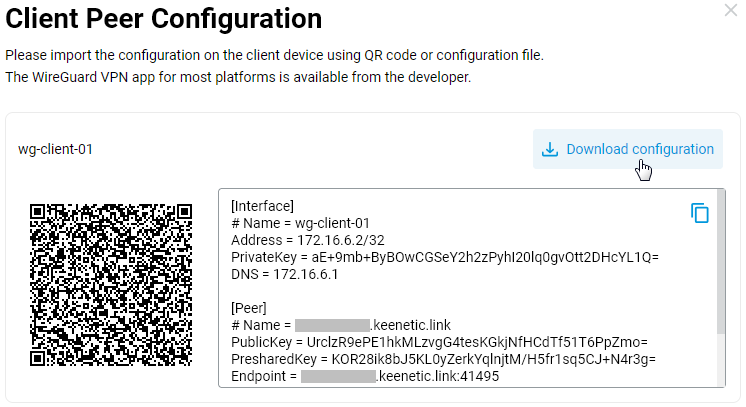
A mobile device (such as a smartphone or tablet) can also be used as a VPN client. The connection on the client side can be created using the QR code displayed in the Client Peer Configuration window. Additional information on connecting a VPN client from a mobile device is provided at the end of the article in the Tip section.
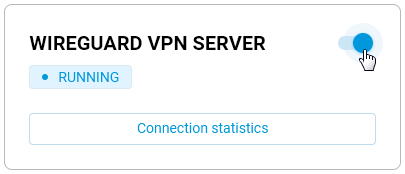
After configuring the server, set the switch to the On position.
Configuring WireGuard VPN client
In the web interface of the router that will act as a VPN client, go to the Other Connections page and click the Import from a file button in the WireGuard section.
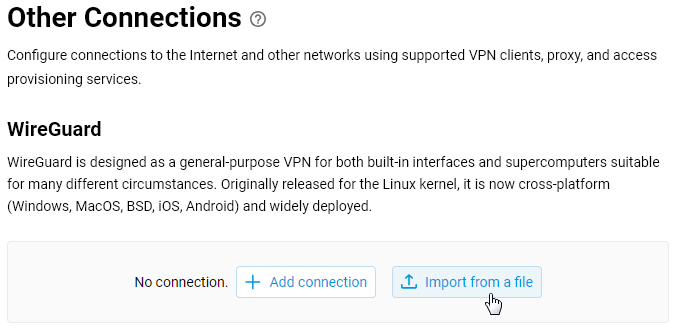
Specify the path to the .conf file previously saved during the WireGuard VPN server configuration, and the connection will automatically appear in this section. Set the switch to the On position.
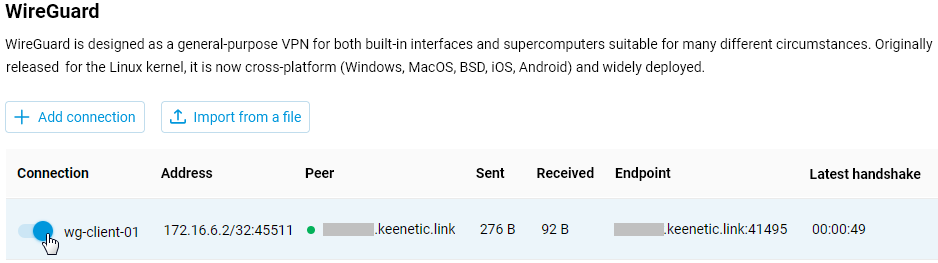
If everything is configured correctly, a green status indicator should appear in the Peer column. The configuration is now complete.
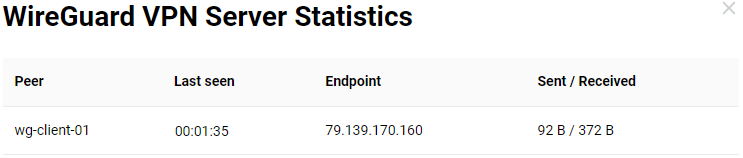
To check the connection, go to the VPN server settings and click Connection Statistics in the WireGuard VPN Server tile to display the connection status and additional information about active sessions.
To check the VPN connection from the router acting as a VPN client, ping the remote router or devices on the network behind the tunnel. To do this, go to the Diagnostics page and use the Ping utility.
Tip
To establish a WireGuard connection from mobile devices, use the free official WireGuard® app. Versions are available for Android and iOS.
Install the WireGuard client on your mobile device and launch it.
To add a tunnel, tap the + icon at the bottom right of the main screen. A menu will appear, tap Scan from QR code and point your mobile device's camera at the QR code that was created earlier and is displayed in the Client Peer Configuration window.
The tunnel will appear in the list; enable it (move the switch to the On position). After establishing the connection, check the server's availability from the client side. If you are an administrator, you can view the Connection Statistics on the VPN server side.