Proxy client
Starting with KeeneticOS 3.9, a proxy client component has been added. This component will be useful for complex tunnelling applications, as well as for the simple task of connecting your network to the Internet via a proxy server. This functionality allows you to configure a connection via proxy servers using HTTP, HTTPS and SOCKS5.
To use a proxy connection, you must first install the appropriate Proxy client system component on your router. You can do this in the web interface on the General System Settings page in the KeeneticOS Update and Component Options section by clicking Component options.

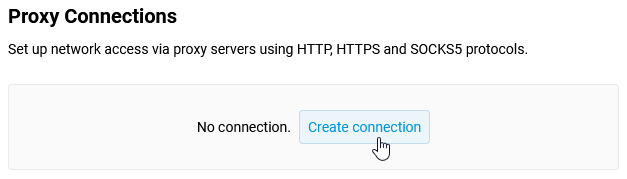
To configure Internet access via a proxy, go to the Other Connections page, scroll to Proxy Connections and click the Add connection button.
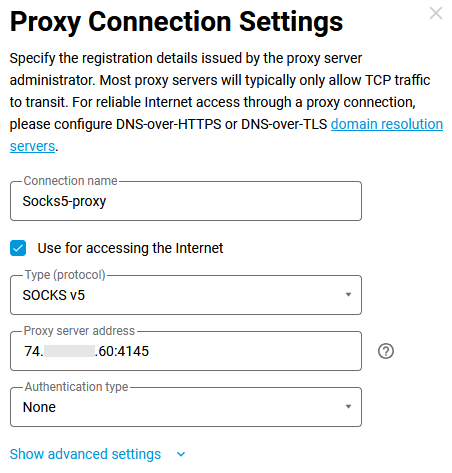
You will then be prompted to fill in certain fields. Enter the registration details provided by your proxy server administrator.
Important
Access to Internet resources via this connection may not work correctly if network devices do not use DNS query resolution via DoT/DoH protocols. For reliable Internet access via a proxy, enable DNS-over-TLS or DNS-over-HTTPS in your router's DNS settings.
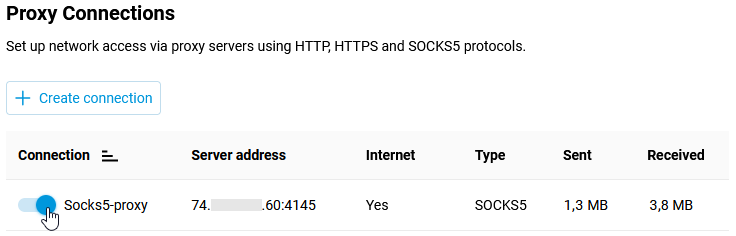
After establishing the connection, set the switch to the On position.
Next, in the Connection Policies menu, configure Internet access via the proxy connection you created. Drag it to the top of the list to make it the primary connection.

After that, all clients connected to the router will access the Internet via a proxy connection. If you need to configure access for only certain clients, you will need to create a separate profile and link specific clients to it. Instructions on how to do this are provided in the Connection policies article.
The setup is complete.
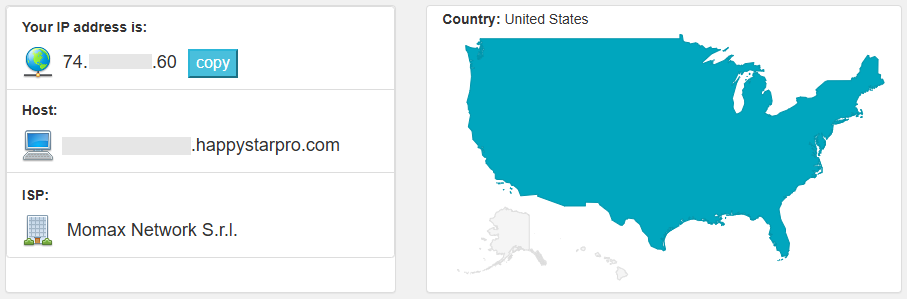
To test it, you can use any public internet service to check the IP address and the country where the IP is located.